What is the Measurement Protocol, and how can it assist with tracking needs?
Understanding your customers means looking at both their online and offline activities. Google Analytics 4 makes it easier to see the full picture with the Measurement Protocol. This tool helps you to combine data from all the ways customers interact with your business, both online and offline. In this article, we’ll show you how to use the GA4 Measurement Protocol to combine all this information, giving you better insights into your customers’ behavior.
The Measurement Protocol allows you to send events directly to Google Analytics 4 from any internet-connected device that can make HTTP requests.
The primary purpose of the Measurement Protocol is to allow us to send additional data about users to Google Analytics 4 for analysis and reporting purposes. This is essential if you want to analyze events that occur outside of standard user interactions, such as offline conversions.
To successfully send a Measurement Protocol hit and link it to the correct user and session, you first need to obtain the Client ID and the Session ID parameters.
Getting Client ID
The Client ID can be obtained from the _ga cookie.
Navigate to Cookies and select your domain. Then find the _ga cookie:
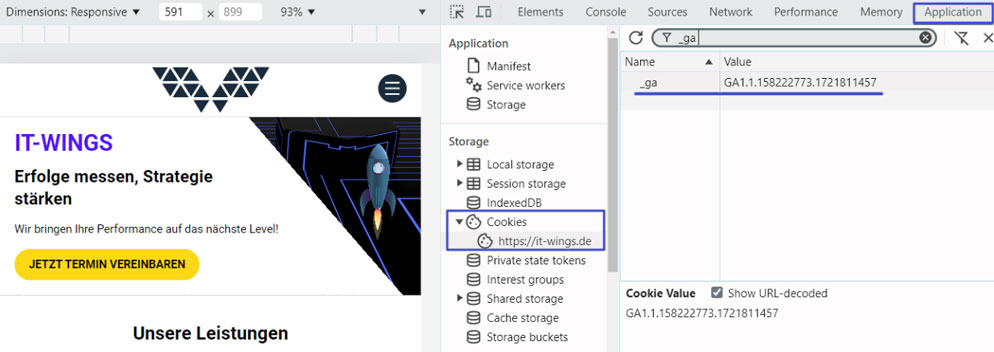
The last two numbers, separated by a dot, represent the client ID. For example, in the screenshot above, the client ID value is 158222773.1721811457.
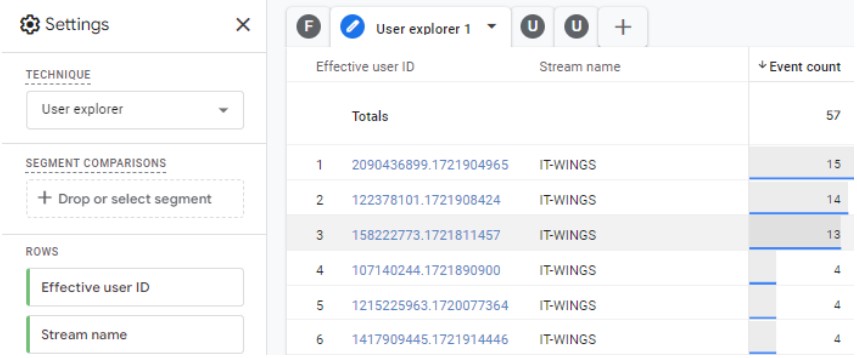
In the GA4 property you can find Client ID under the exploration reports → User Explorer (the GA4 UI name is “Effective user ID” ):
To get the Client ID you can use different ways:
- using Custom JavaScript variable in GTM,
- using the “get” command in gtag(),
- using a GTAG GET API tag template in GTM.
We tested various approaches, and the most reliable in terms of data accuracy and ease of setup was the GTAG GET API tag template.
To implement this solution you need to add a corresponding tag template from the Community Template Gallery to your workspace and create a new tag, based on this template.
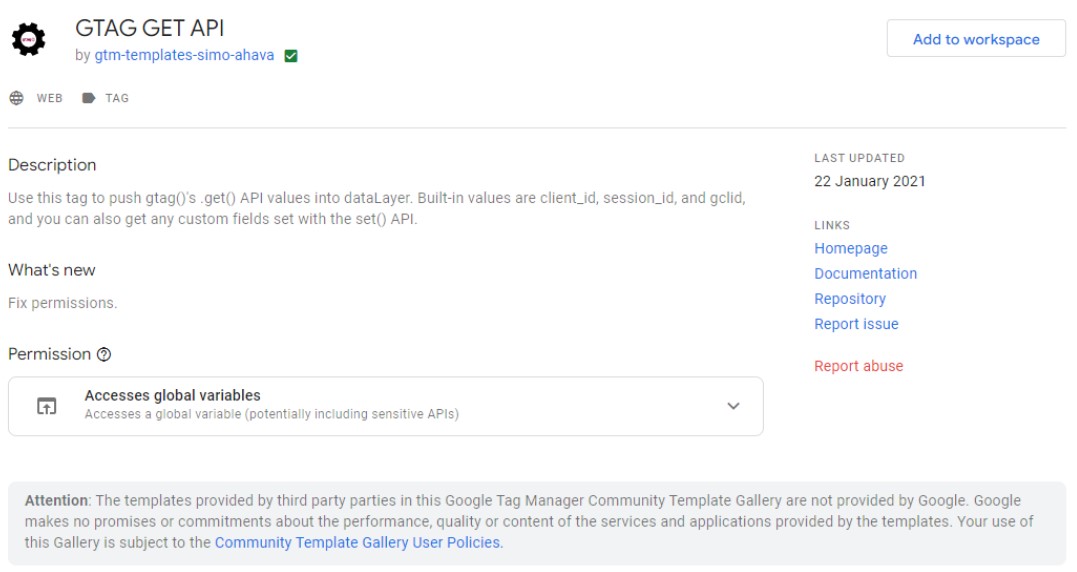
This tag utilizes the .get() API of Google Site Tag and pushes the values of certain GA fields (like Client ID) into the dataLayer. You can find here the detailed manual on how to install it.
In case you use a server-side GTM with the server-managed cookie and client identification option, the value stored in FPID will be utilized for setting the Client ID in the request to Google Analytics:

The last two substrings, separated by a dot, represent the client ID. In the screenshot above, the client ID value is dHPJu/nEvXOMubOWOWFnSqiAbwHeaJft2PvqIsVSEJg=.17127…
Since it’s an HttpOnly cookie, it is not accessible via browser JavaScript. Instead, it can be retrieved by a web server handling HTTP requests within a domain where the cookie is accessible
Getting Session ID
The Session ID can be also found in Cookies, specifically within the _ga_<measurement ID> cookie (in the third field):
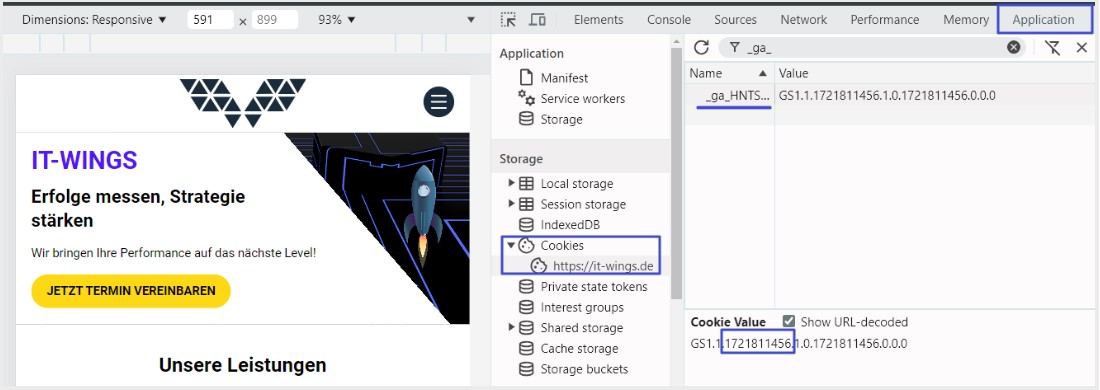
In the screenshot above Session ID = 1721811456.
Since when a session begins, Google automatically collects a session_start event and generates a session ID (ga_session_id property), we can use this value for obtaining a Session ID as well.
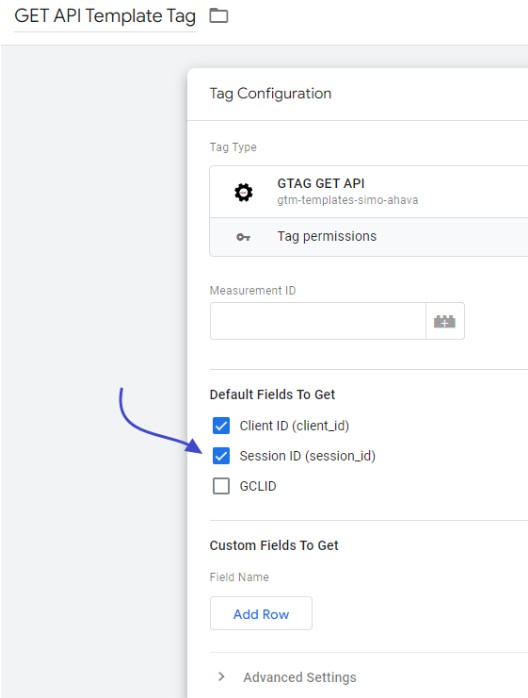
As an alternative, the Session ID can also be obtained using the GTAG GET API tag template. To do this, in addition to the Client ID option, you need to enable the checkbox for the Session ID in the GET API template-based tag:
How to build the Measurement Protocol request
When we have the Сlient and Session IDs, we can proceed with forming the Measurement Protocol request. For testing requests, we can use the GA4 Event Builder.
The GA4 Event Builder is a tool that allows you to build, validate, and send events to your GA4 property via the Measurement Protocol.
In Event Builder, you will need to add an API Secret and the Measurement ID of your GA4 property.
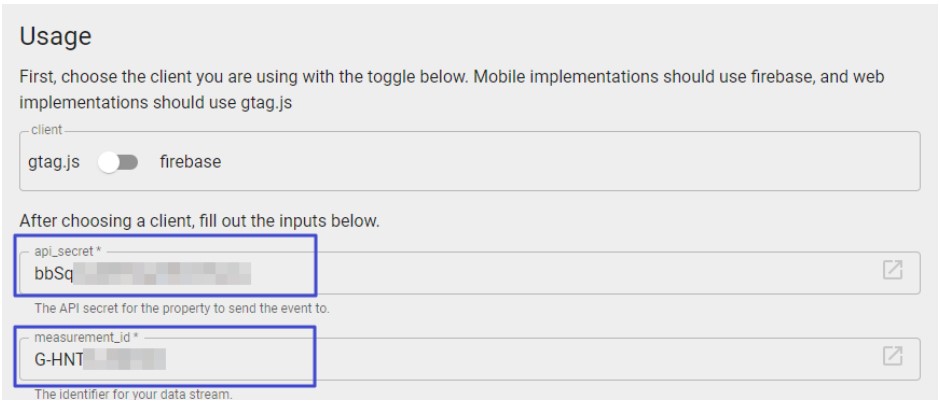
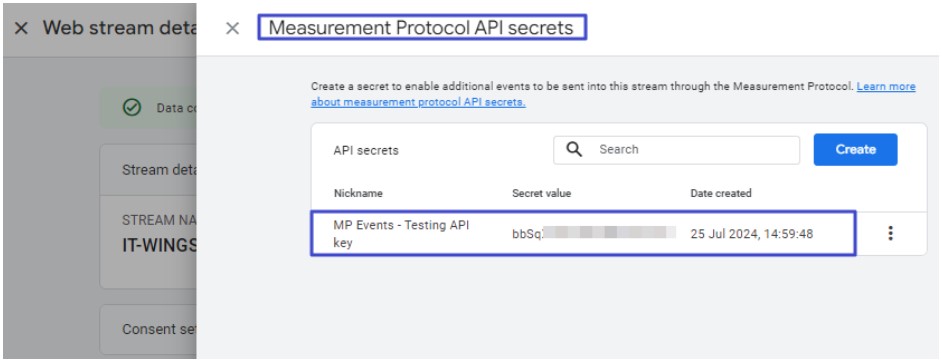
To get the API Secret, go to GA4 Admin → Data collection → Data streams → Measurement Protocol API secrets, and create a new API secret:
GA4 Measurement ID is available on the Data stream details tab:

In the client_id field, we need to add the Client ID value that we obtained before. Depending on what event you want to send (recommended or custom), you select a category and give the event a name.
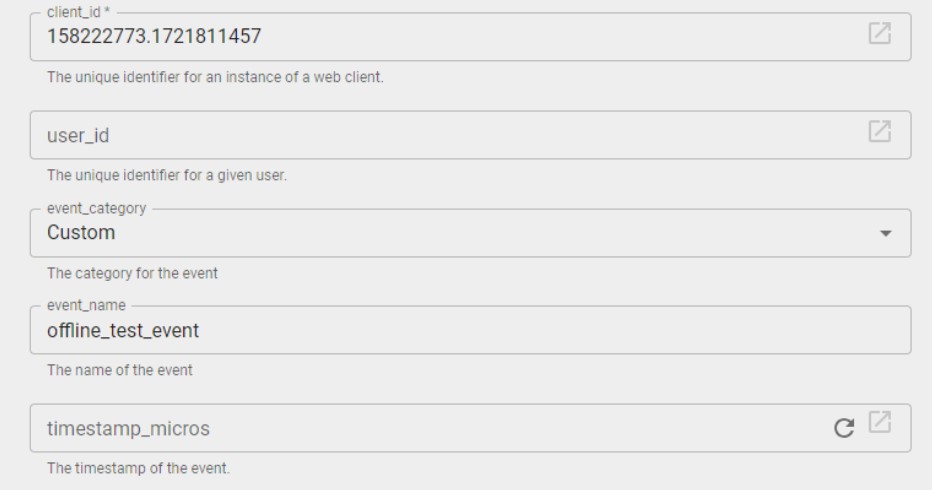
Another element you might need when sending a Measurement Protocol hit is the timestamp of the event, specified in microseconds:
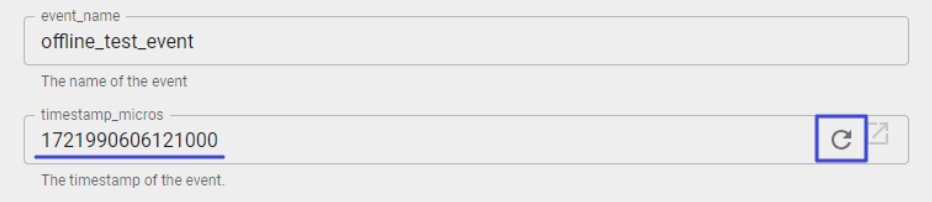
This is a Unix timestamp representing the time to associate with the event. It is an optional parameter and should only be used for recording events that occurred in the past. Events can be backdated up to 72 hours. The timestamp should be set shortly after the online session begins to ensure that GA4 accurately links online and offline activity.
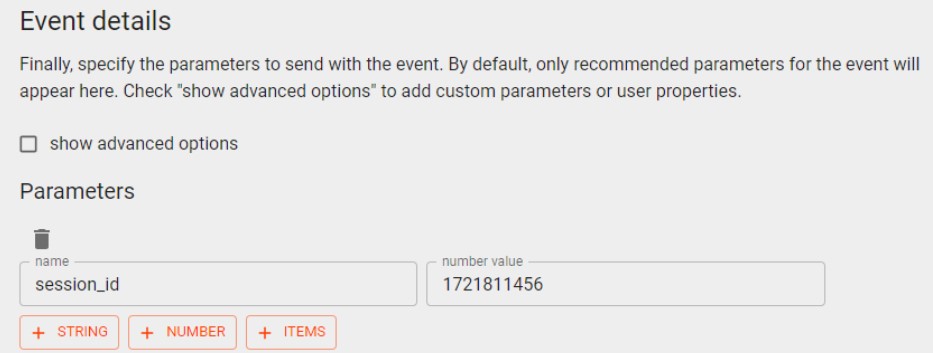
In the “Event details” section we need to add the new parameter for sending the Session ID value that we obtained before:
When you are done with the event configuration, you will see the Request information and a payload:

In case of using a server-side GTM with the server-managed cookie for your project, the measurement protocol request will look the same, but with the corresponding client_id value from the FPID:
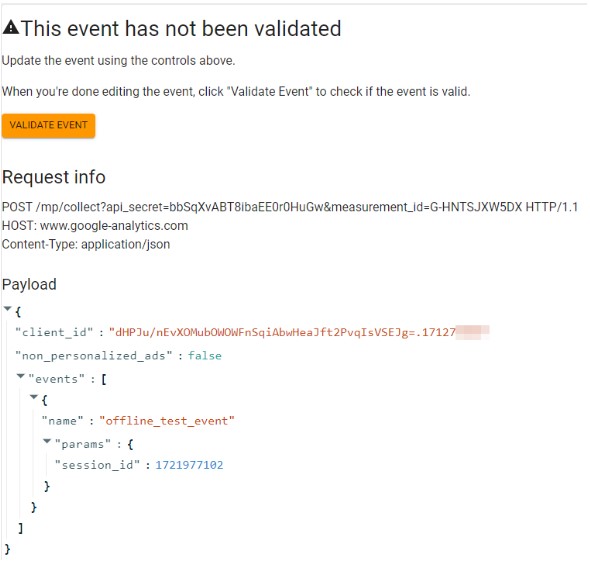
Click on “Validate event”, and if it is valid, click to send it to GA4.
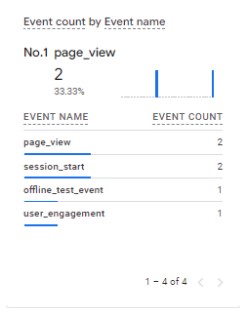
You can see your event immediately in the GA4 real-time report:
Then, after some time, your event will appear in the analytics reports
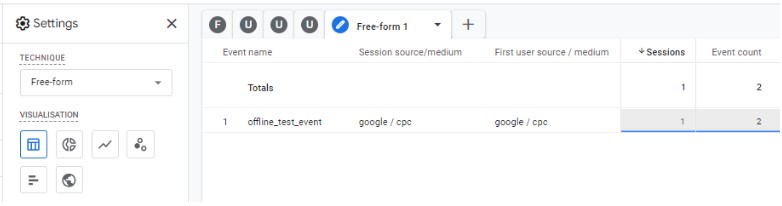
and will be linked to the user and session for which we sent it. User-scoped and session-scoped properties will be inherited from online activity.